Smartphones have essentially changed the way we capture photographs. Unlike the old days, you don’t have to wait for the perfect shot without any background elements. Instead, you can get rid of unwanted objects later. All you need is a smartphone/app with an object eraser.
In this guide, I will tell you how to use an object eraser on an iPhone to eliminate unwanted elements from your photograph.
Using Object Eraser on iPhone
There are two ways to remove objects. One, you can use the built-in Magic Eraser utility as part of the Apple Intelligence package. Alternatively, regardless of your iPhone model, you can use Google Photos and its Magic Eraser feature to remove objects from a photograph.
What is an Object Eraser on an iPhone?
Depending on your question, an object eraser on an iPhone might mean two things.
One, you might be referring to one of the markup tools that you can find in the Photos and Notes app on your iPhone. This is an eraser tool that lets you remove the changes you have made using one of the markup tools. For instance, if you have made a drawing or inserted a shape into a picture, you can use the eraser tool to remove that object from the image. You can use it in the pixel eraser mode or object eraser mode according to your need.
The second situation is where you want to remove something from a photo you have taken. In this case, you have to use one of the AI-powered features that will analyze the picture frame and help you remove something without leaving a gap. This object remover utility is not available everywhere. It needs to be installed as part of the iOS 18.1 package and Apple Intelligence, and it might not be available in all regions. Or you can use another object remover tool available for your iPhone.
How to Use Object Eraser on iPhone Photos
Fortunately, Apple’s Photos app is not the only option to use object eraser on your iPhone. Instead, you can go for multiple options.
Method #1 Photos App + Apple Intelligence
In this method, you have to use the built-in object eraser tool that you can find in the Photos app on your iPhone. To use this feature, you should be running iOS 18.1, which includes all the features of Apple Intelligence. As part of this AI-powered toolkit, you will have the option to analyze a particular photograph and remove elements that you do not want in the frame.
Method #2 Google Photos + Magic Eraser
In this method, you can use a third-party AI-powered editing app, and I recommend using Google Photos, which is available free of cost. You can install this application on your iPhone and open the photo you want to edit. Once opened, you can find an option to use the Magic Eraser feature. This feature lets you select the object you want to remove.
Method #3 Third-party Object Remover Apps
In this method, you can use one of the many third-party applications that let you remove unwanted objects or elements from your photograph without spending too much time. One option is to use something like Photoshop, which gives you much control over how you edit photos. The second one is to use an AI-powered object remover app, many of which can be found on the App Store.
Step-by-Step Guide to Using Object Eraser on iPhone
Now, I shall share step-by-step instructions to use an object eraser on an iPhone.
Note: As I said, the actual object eraser feature is available only with iOS 18.1. You should have an iPhone with full support for Apple Intelligence to use the feature. That is, you must have an iPhone 15 Pro, iPhone 16, or iPhone 16 Pro. So, if you don’t have one of these, you have only two options to use the object eraser. Therefore, I recommend the best option: Google Photos.
Step 1: Install Google Photos
- First, you have to download Google Photos on your iPhone. You can get the app from the App Store, and it does not cost anything.
- Once you have installed Google Photos, you may have to connect your Google account. It is required for you to use the Magic Eraser option.
Step 2: Open the Photo
- Now that you have synchronized your camera roll with Google Photos, you can find all the photos you have taken. Select the photo you want to edit.
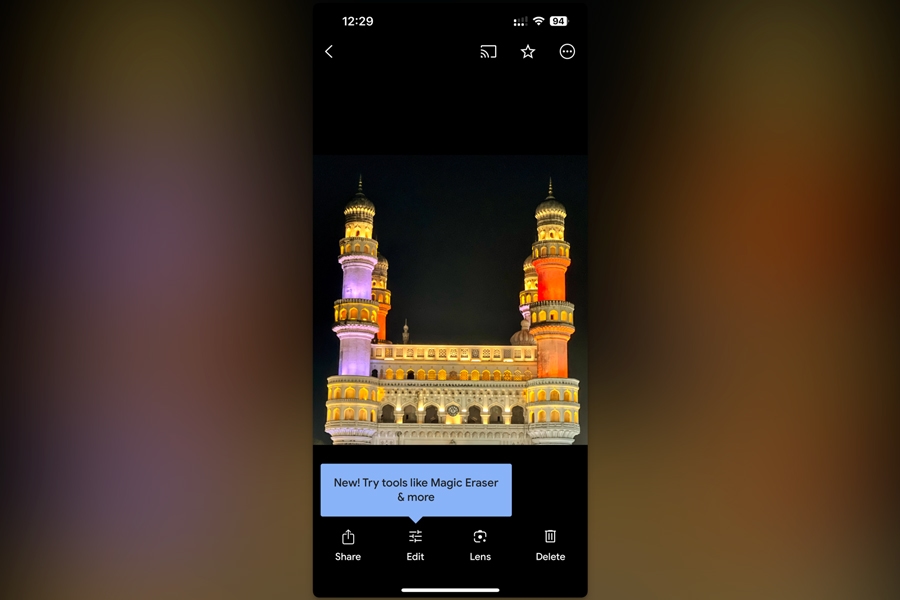
- If you are using the app for the first time, Google Photos will ask you to check out many of the new features, including the Magic Eraser utility.
- Click the Edit button to proceed.
Step 3: Remove the Object
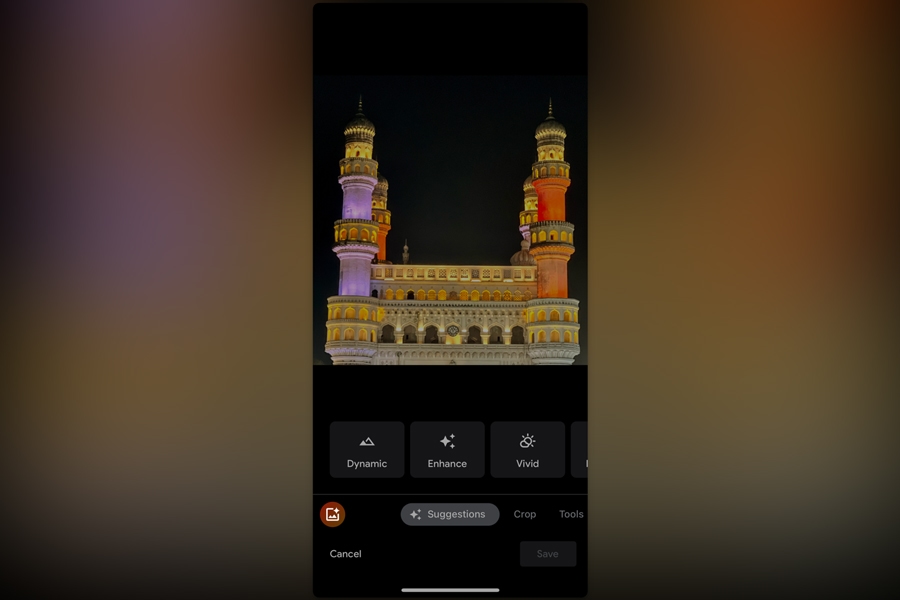
- Once you are in the Editor interface, tap the AI Magic Eraser button on the bottom left portion.
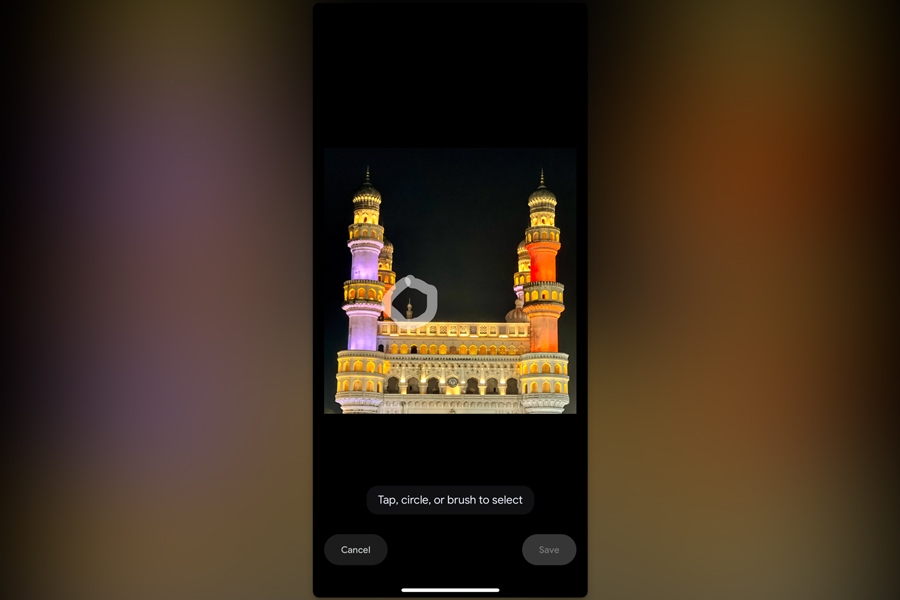
- Now, as asked, select the area on the image that you want to remove. You can tap on an object or use the brush tool to select the area.
- In a second, Google Photos will intelligently select and separate the area. You will be asked to confirm your action to erase the object.
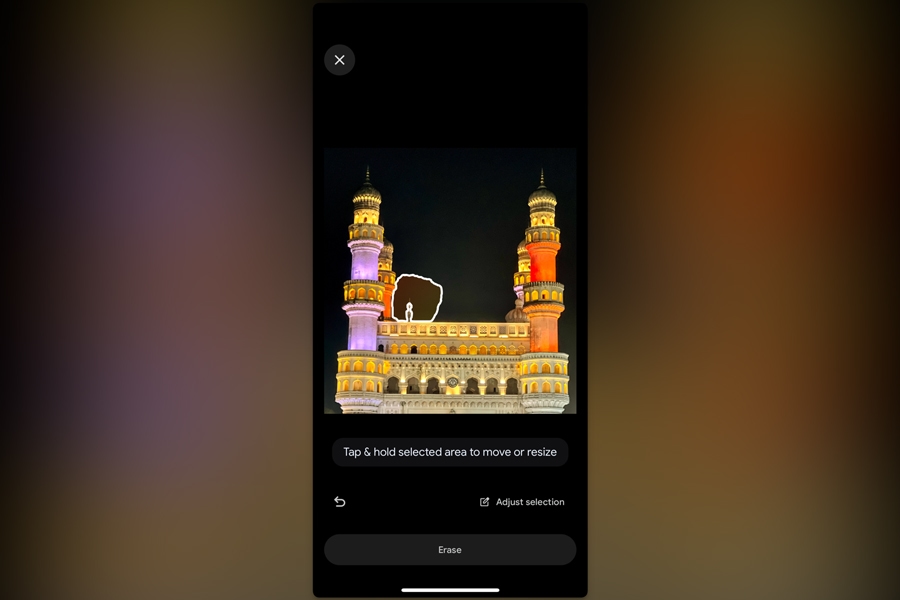
- Tap Erase and wait while Google Photos generates some options.
Step 4: Select the Best Version
As I said, Google Photos will show several options.
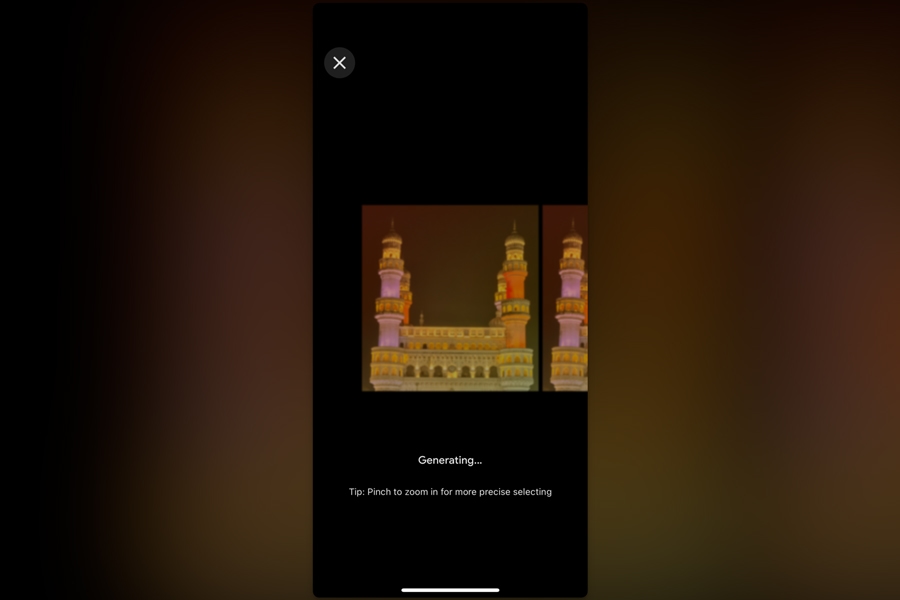
- You can slide between the options and choose the best-looking work from Magic Eraser.
- Tap the Check button, and you will find the object removed from the image.
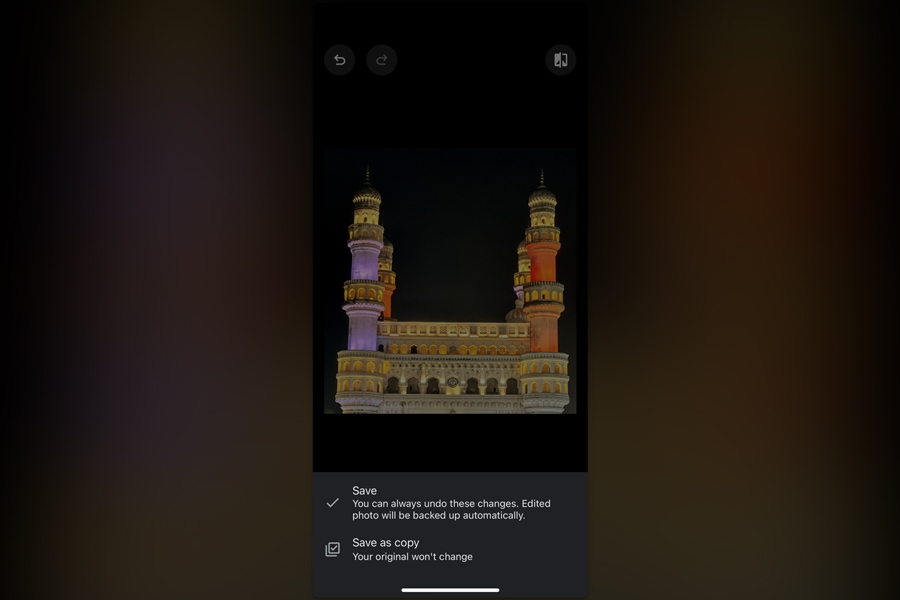
- You can now save the image or save it as a copy.
- That’s it! You have successfully removed an object from your image.
Frequently Asked Questions
You can use Pixel Eraser on an iPhone by installing the Google Photos app on your device. This application provides almost all the features, including the Pixel Eraser option, which utilizes Google’s AI technologies to remove objects from a picture.
You can use the built-in object remover utility on the Apple Photos app if you have iOS 18.1 with full support for Apple intelligence. Otherwise, you can use a third-party photo editor with object remover, such as Google Photos.
You need to use an object remover utility from a photo editing app to cut out an object in a picture on your iPhone. You can use the Apple Photos app or Google Photos app.
There is a Magic Eraser utility on iPhone, but it is available only if you have full support for Apple Intelligence. Your iPhone must be running iOS 18 or later to get this feature.
Yes, you can remove something in the background of a picture on an iPhone using a magic eraser utility. You’d find it in the latest Photos app or Google Photos.
Final Thoughts
As you have seen, there are different ways to remove objects from your photograph using an object eraser utility. However, depending on the iPhone you have and the version of iOS you are running, you can choose one of these options.
The option detailed here is the one using Google Photos, which offers state-of-the-art AI to help you remove objects from your photographs. This works great for changing the background or adding or removing elements from a photograph. You also get multiple options to choose from, which is a great advantage!
1 Comment
I actually tried it cause I don’t want to update my iPhone, and it turns out pretty good! thanks..